Later this week I’ll be making my 3rd frame! Frames take a long time to make. So far I have watched different Youtube videos so I can learn how to improve to make an even better frame. For now I will be sharing a few steps on how a frame is made! I will be putting a Canva link of tool information.
The first step doesn’t require too much effort. All you need to do is find the perfect moulding for your perfect picture. A moulding is basically the border around your frame. Before putting the frame on to your picture you need to find the measurements for the frame but the company making the frame for you will always do that to double check. The measurements are usually in inches. A tip for this is measure twice cut once. Measuring is one of the MOST IMPORTANT things to know when making the frame. A tool for this is a measuring tape. People in companies have this machine that is use to cut the mouldings very precisely. They also have machines that will firmly join the mouldings together by using corner nails and glue. After the framing company has to slice the glass to fit the frame PERFECTLY. Then, they join all the parts together. Lastly the screws are screwed into the frame with hooks attached and then they’re done! They seem super simple as an end result but it requires a lot of effort. If a measurement isn’t precise your frame won’t look right. I hope these help you learn to make a frame.
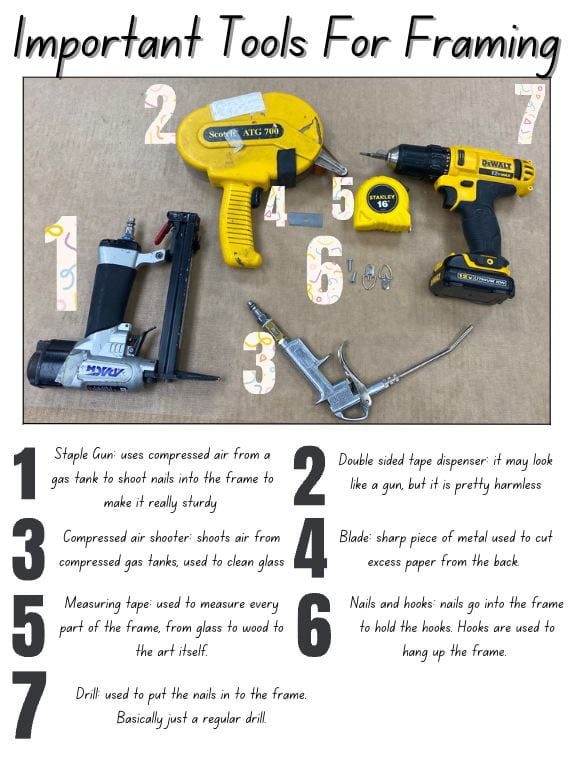
Love the poster! I wonder if you could screenshot it and add it right into the blog post as an image?